Cleaning a laser printer drum from time to time is a smart maintenance move that will save you the cost of buying a new unit sooner. Build up of toner dust, dirt, and debris tends to deteriorate the performance of the drum unit leading to poor printer output among other printer problems.
However, it is important to use a proper procedure when cleaning the drum. Otherwise, you could end up destroying the delicate component. But how do you go about cleaning a laser printer drum? That is a question that this article aims to answer. Read on for a comprehensive guide.
Printer Drum Cleaning Tools
To give the printer drum, you need a few accessories including safety gear and the right tools to make your work easier. Therefore, you need to have a microfiber cloth or a toner that will work to clear the surface of the drum. Toner and microfiber cloths are a perfect choice thanks to their gentle fibers.
The drum surface is somehow delicate and thus you need to utilize a non-abrasive material to avoid inflicting any damage. You will also require an isopropyl alcohol solution to neutralize and dissolve stubborn toner patches as well as any destructive elements coating the drum’s surface.
Furthermore, the alcohol solution is an excellent choice owing to its ability to evaporate fast. Quick evaporation does not leave behind any residue. For your safety, you will need a nice pair of gloves along with a reliable dust mask. It is vital to have gloves and a mask since powdered toner is toxic. It can be irritating when inhaled.
Printer Drum Cleaning Process
The effectiveness of the cleaning process is as good as the tools you possess. Thus, ensure you have your toner or microfiber cloth,isopropyl alcohol solution, dust mask as well as a pair of gloves before swinging into action.
Here is how to go about cleaning your printer drum:
Step 1: Power Down the Printer
The first step to cleaning the drum is turning the laser printer off. When that is done, take out the power cord from the socket or power source. Thereafter, disconnect the printer from the computer and give it time to cool down.
While waiting for the printer to cool down, go ahead and put on your gloves and mask. Take a newspaper and lay it on a flat leveled surface to create some sort of a workspace. You will place any parts of the printer with toner stains on the paper.
Step 2: Extract the Drum From the Printer
Remove the drum from the printing component by opening its case. Carefully take out the toner cartridge and place it gently on the newspaper. The drum could be an individual unit or it could be incorporated into the structure of the printer’s toner cartridge. Take time to find the drum unit and eject it carefully from the chassis of the printer.
Take extra caution while doing this to avoid touching the drum’s surface with your fingers. It would be prudent to seek professional assistance if it gives you a hard time at this stage. Otherwise, proceed to the next step.
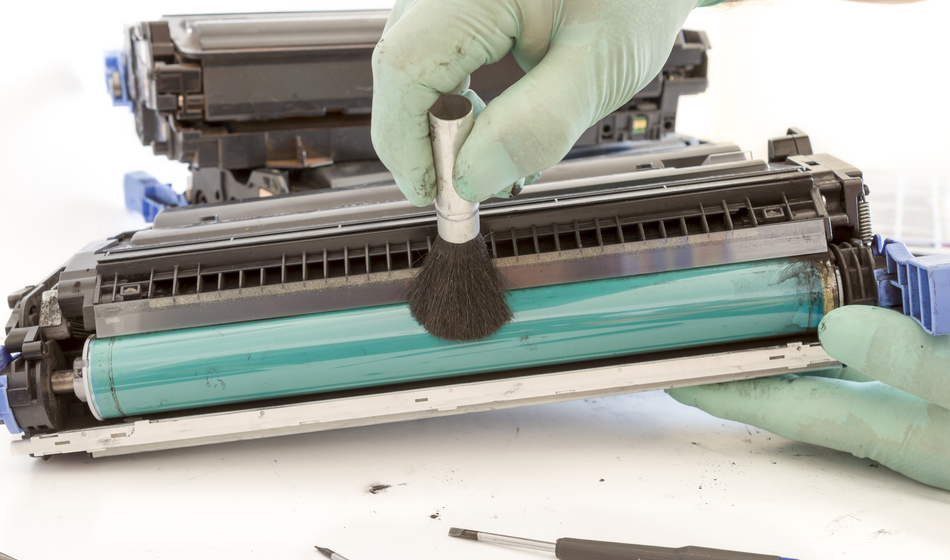
Step 3: Give the Drum a Nice Clean
Once the drum is out, use your gloves to hold it by its edges or the end. After that, utilize a microfiber cloth or toner to wipe down its outer surface. The purpose of doing that is to get rid of any debris, dust, and toner powder that may be hanging loosely on the exterior.
When it looks clean, get some isopropyl alcohol on the cloth and keenly wipe the drum’s exterior once more to remove persistent toner patches.
Step 4: Reattach the Drum to the Printer
Finally, tidy up the outer surface of the printer and then store the drum away from light. The light-sensitive component could be damaged if exposed to light. Now that the drum component and the printer are spotlessly clean and completely dry, go ahead and put everything back in place. Return the drum to its place and reattach other components as well.
Conclusion
Cleaning the printer drum is not rocket science. You do not need to have any over sophisticated equipment either. The guide above should be enough to help you give a proper clean to your printer’s drum and prolong its service.